PLEASE FEEL FREE TO CONTACT US IF YOU HAVE ANY QUESTIONS.
PLEASE BE PATIENT WITH US AS WE ARE STILL A VERY SMALL COMPANY WITH ONLY A FEW PEOPLE TO HELP RESPOND AND TAKE CARE OF ALL YOUR CUSTOMER SERVICE NEEDS. THANK YOU!
PLEASE FEEL FREE TO CONTACT US IF YOU HAVE ANY QUESTIONS.
PLEASE BE PATIENT WITH US AS WE ARE STILL A VERY SMALL COMPANY WITH ONLY A FEW PEOPLE TO HELP RESPOND AND TAKE CARE OF ALL YOUR CUSTOMER SERVICE NEEDS. THANK YOU!
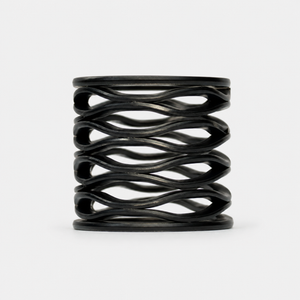
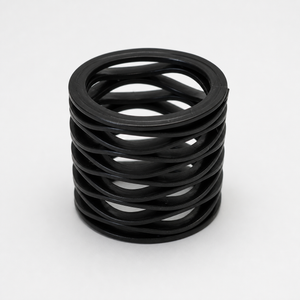
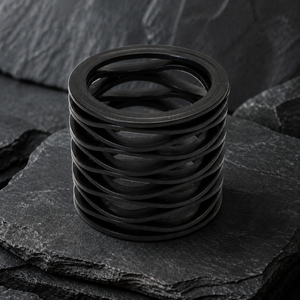
Skeleton Air Regulator Wave Spring - CS3 / R5 / LV2 / 170R / 180R / DSR / MXR / DLX AIRE / ICE / X / TM40 / IDOL / SHOCKER AMP ERA
The pre-set Skeleton Air Regulator Wave Spring is a quick, drop-in performance upgrade for modern Planet Eclipse, DYE, and DLX Luxe markers. Its precision woven flat-wire design moves the marker regulator return to setpoint pressure faster than stock for smoother, more precise velocity and improved ball-on-ball and land shooting accuracy.
This version was pre-set at Powerhouse MFG in the USA with a custom made robotic press and does not require shims.
Modern Marker Fitment
Infamous, in collaboration with Powerhouse, is bringing wave spring technology from the bottle regulator to a new generation of paintball markers.
Wave spring technology uses a precision woven flat-wire spring designed to improve consistency and reliability. It helps your marker regulator return to setpoint pressure quickly, supporting smooth, consistent velocity and improved ball-on-ball accuracy.
Powerhouse first introduced wave spring technology in its competition-proven Haymkr, TKO, and Counterpunch regulators. After extensive development and testing, that same performance-driven approach is now available as a quick, drop-in regulator upgrade for select Planet Eclipse, DYE, and DLX Luxe markers.
This version of the Skeleton Air Regulator Wave Spring is pre-set for the compatible marker platforms listed below. No shims are included, needed, or used with this version.
Why upgrade?
Moves the regulator return to setpoint pressure quickly and accurately
Promotes smooth, consistent velocity
Supports improved ball-on-ball accuracy
Precision woven flat-wire construction
Quick, drop-in installation
Pre-set design with no shims required
Fits select modern Planet Eclipse, DYE, and DLX Luxe markers
Important installation instructions — read before installing
The velocity adjustment screw must be turned all the way in before the new wave spring is installed. On all compatible markers, turning the screw in clockwise lowers velocity, while turning it out counterclockwise raises velocity. Do not begin installation with the marker's previous velocity setting.
Unload and completely de-gas the marker before beginning installation.
Using the correct velocity Allen key for your marker, gently turn the velocity adjustment screw all the way in clockwise to its lowest velocity setting. Do not overtighten.
Install the pre-set Skeleton Air Regulator Wave Spring according to the installation instructions for your marker.
Completely reassemble the regulator and marker.
Verify that all ASA screws are firmly secured before applying air.
Air up the marker with the velocity adjustment still at its lowest setting.
Using a chronograph, slowly turn the velocity adjustment screw out counterclockwise to bring the marker up to the desired operating velocity.
Make small adjustments and recheck the velocity after each change.
Velocity Allen key sizes
Planet Eclipse CS3, CS3 Pro, and GTEK 180R:5/32-inch Allen key
DLX Luxe AIRE:1/8-inch Allen key
DYE DSR and MXR: Use the correct velocity adjustment key specified for your marker model.
Important: The velocity Allen key size varies by marker. Never force an incorrectly sized tool into the adjustment screw.
Quick installation guide
Step 1 — Turn the velocity screw all the way in
Before installing the spring, use the correct Allen key for your marker and gently turn the velocity adjustment screw all the way in clockwise to its lowest velocity setting. Do not overtighten.
Step 2 — Install the pre-set wave spring
Install the spring and completely reassemble the regulator. This version is pre-set and does not use shims. Verify that all ASA screws are firmly secured before applying air.
Step 3 — Air up and adjust slowly
Air up the marker and check its velocity using a chronograph. Slowly turn the velocity adjustment screw out counterclockwise to raise the velocity to the desired setting. Make small adjustments and recheck the velocity after each change.
Important warning
TURN THE VELOCITY ADJUSTMENT SCREW ALL THE WAY IN CLOCKWISE BEFORE INSTALLING THE WAVE SPRING.
After installation, air up the marker and slowly turn the velocity adjustment screw out counterclockwise to bring it to the desired velocity using a chronograph.
Planet Eclipse CS3, CS3 Pro, and GTEK 180R markers use a5/32-inch Allen key. The DLX Luxe AIRE uses a1/8-inch Allen key. DYE owners should use the correct velocity adjustment key specified for their marker model.
This wave spring is pre-set. Do not add shims.
Important: Firmly secure all ASA screws before airing up the marker.
PE Install Video Example:
Daniel W.
There are of course lots of variables involved, but over the last two weekends of playing my ropes of paint have appeared to be much more consistent. I reduced variables as much as possible by consistently maintaining my marker (180r) and bore matching, etc.
TODD L.
Pretty easy to install, you can see and feel the difference between the 2 springs easily. Shooting definitely tighter with less fluctuations. Winner in my book...
Tyler
These things are magic, Bought two of them but have a 3rd on the way
Nils B.
Great products... Eddie's support on Instagram is amazing.
Austin
The installation of the wave spring is super easy and straight foward, just make sure to turn your velocity all the way down before starting the install. I put this in a planet eclipse 180r and when paired with a counterpunch regulator there is definitely less jump in fps shot to shot when using an xradar chronograph to test.
Christopher
Took only a sec to install. Will find out how well then works tomorrow
Customer Reviews
Overall rating: 4.8 / 5 from 6 reviews.
There are of course lots of variables involved, but over the last two weekends of playing my ropes of paint have appeared to be much more consistent. I reduced variables as much as possible by consistently maintaining my marker (180r) and bore matching, etc.
Pretty easy to install, you can see and feel the difference between the 2 springs easily. Shooting definitely tighter with less fluctuations. Winner in my book...
The installation of the wave spring is super easy and straight foward, just make sure to turn your velocity all the way down before starting the install. I put this in a planet eclipse 180r and when paired with a counterpunch regulator there is definitely less jump in fps shot to shot when using an xradar chronograph to test.